Design and Construction of Celtic Knotwork
✦ ✦ ✦Two methods for designing Celtic knotwork — the "Interlacing Without Erasing" method described in many SCA documents, and the "Centerline Knotwork" method described by George Bain. Both methods are similar, but each has its own advantages.
Knotwork designs are not unique to Celtic art — many cultures and periods have used such designs. By looking at construction lines and dots that show through pages, research has found that both of these methods were used in period.
Interlacing Without Erasing
As suggested by the title, this method doesn't require any erasing when complete. The dots used to guide the pattern are located in the background area of the knotwork — the area which will typically be painted or carved. This is a very free-form design method and is useful for covering oddly shaped regions. It's described in the Knowne World Handbook, discussed at length in Compleat Anachronist #118 (Winter 2003), and used in classes and books by Mark van Stone.
Step 1 — Creating a grid of dots
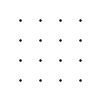
Start by drawing a regular rectangular grid of dots, filling the space in which you wish to put knotwork. Dots should be equally spaced. The distance between dots is roughly the width of the knotwork ribbons you will be creating.
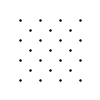
Once the rectangular grid is complete, add an additional dot to the center of each square. This forms the diagonal dot grid needed for knotwork.
Step 2 — Adding breaks
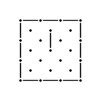
Unless you want a regular weave pattern throughout the entire shape, add breaks to cause the knotwork to loop back on itself. A break is a line that the knotwork is not allowed to cross — for example, the entire edge border of the design is a break. A break is either a horizontal or vertical line connecting one or more dots. Breaks can intersect at a dot, but should not cross each other anywhere else along the line.
Breaks are useful for leaving holes in your knotwork. For example, when carving, you might want the knotwork to flow around a defect in the wood — surround the defect with breaks. A symmetric or uniform pattern of line breaks results in a symmetric and more pleasing knotwork design.
Step 3 — Weave the ribbon
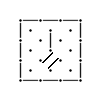
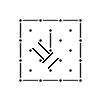
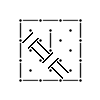
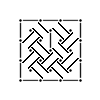
Starting in an open area of your dot grid (not next to a break), draw two diagonal lines between the dots as shown. This is the start of your ribbon. Draw another set of diagonal lines going the opposite direction adjacent to the first set. Continue expanding outward, drawing the diagonal strips in opposite directions. This forms the under-and-over weave pattern typical of regular knotwork designs.
Step 4 — Curving at the breaks
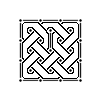
Your ribbon is not allowed to cross a break. But your ribbon is diagonal and breaks are horizontal or vertical. So when you approach a break, simply curve the ribbon to avoid it.
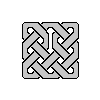
This method allows you to draw as you go — no initial layout other than the grid of dots. Easy to learn, and good for "doodling" knotwork. The drawback is that you have less control over the overall design. If you're trying to achieve a specific effect, such as a single ribbon intertwined with itself, the next method is better.
Centerline Knotwork Construction
In a classic work by George Bain called Celtic Art, the Methods of Construction, a slightly different design method is documented — what I call the "Centerline" method. This is the method most easily identified in the Book of Kells. Many people find this method more complex because it requires more drawing and erasing. However, it's really no different from the previous method, except that you do more "up front" design work to determine the exact course of your ribbon.
Step 1 — Creating a grid of dots
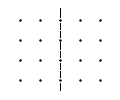
The first step is similar to the previous method. Draw a rectangular grid of dots — but it's important to have an odd number of dots in at least one direction. You can ensure this by dividing the direction in half, as shown by the dotted line in the example.
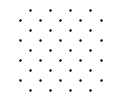
Add a center dot to each square, but also add a center dot just outside the border along the longest edge (top and bottom edges in this example).
Step 2 — Adding breaks
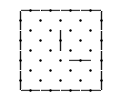
As with the previous method, breaks control where the ribbon is not allowed to cross. Breaks are still horizontal and vertical lines, but instead of connecting dots together, a break is centered on a dot. You can still join breaks; in this case, breaks can intersect between dots, but not on a dot itself.
Step 3 — Draw the centerline
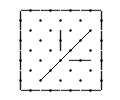
The centerline of your ribbon is formed by connecting the dots diagonally. Keep following the centerline until you come to a break, then curve to avoid the break and connect to the nearest dot going the opposite diagonal direction. Continue until you reach your starting point. If you've crossed each dot twice (once in each diagonal direction), you have a single-ribbon pattern. If there are dots you missed, either start at one of those dots and draw a second centerline, or modify your breaks to redirect the current centerline.
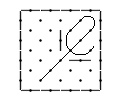
Most of your time with this method is spent getting the centerline to go where you want and form the pattern you want. Because you've drawn only a single line, it's easier to modify the path of your ribbon by changing breaks than it is with the previous method.
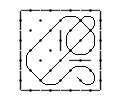
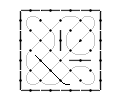
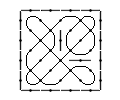
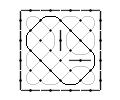
Step 4 — Draw the highway
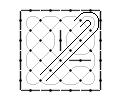
Think of your completed centerline as the center line of a roadway. Your next job is to draw the edges of the road around the centerline. When done, your ribbon will consist of three lines: the two outer edges, and the center.
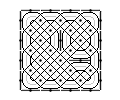
Step 5 — Weave the ribbon
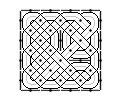
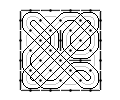
Pick an intersection somewhere in your design and decide whether it's an "over" or "under" point. To continue the road analogy: two roads crossing — one needs a bridge over the other. Once you decide which is on top, ink the outer lines and the bridge. Following the road, reverse the bridge at every intersection: if you started on top, go under at the next one. Continue this over-and-under approach until you've defined every intersection.
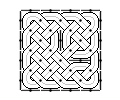
Try to think about drawing a road as viewed from above, showing how they cross over and under each other.
Step 6 — Erase the centerline
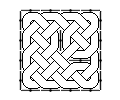
The final step is to erase the remaining construction lines — centerline and dots.
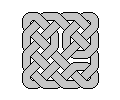
The second method has more steps, which makes it more time-consuming. The advantage is greater control over the overall design. By drawing the ribbon centerline as a single complete figure, you end up with a smoother and cleaner ribbon compared to the piece-work construction of the first method.
Try both methods to see which you find easier. I tend to use the first method when carving knotwork in wood — it's easier to flow around defects, and there's no cleanup required. I've used the second method for all of the Celtic scrolls I've done because it gives me more control and a cleaner final look.
References
- Bain, George. Celtic Art, the Methods of Construction. Dover Publications, New York, 1973. Originally published by William MacLellan & Co, Glasgow, 1951.
- Sherbring, Melinda (SCA Éowyn Amberdrake). "Characteristically Pictish: An Analysis of Ornament on Carved Stone." The Compleat Anachronist #118, Winter 2003, SCA publication, Milpitas CA, 2003.
- Sherbring, Melinda (SCA Éowyn Amberdrake). "Interlacing Without Erasing." Known World Handbook, 2nd edition. SCA publication, Milpitas, CA, 1985.
- van Stone, Mark. Celtic Knots: Techniques & Aesthetics. Arvada CO, Alphabet Studio, 1992.