Making an SCA Scroll
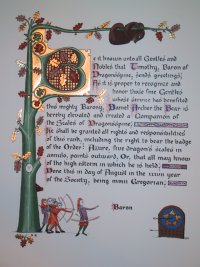
✦ ✦ ✦A walkthrough of the creation of the Scales of Dragonsspine for Daniel Archer the Bear — a Baronial service award presented at Baron's War on 3 August 2002. The scroll is based upon the Luttrell Psalter; A&S documentation here.
1. Calligraphy first
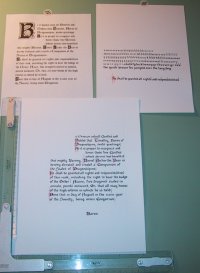
The first step in creating any scroll is the calligraphy. You don't want to spend 20 hours illuminating a scroll and then make a mistake in the lettering — calligraphy only takes an hour or two, so if you do it first and make a big mistake (like leaving out a word), you've only lost a couple of hours.
I write the scroll text in a word processor, add the correct names and dates, change wording (so the first line begins with the capital I plan to illuminate), then print it in a large font that approximately matches the size of the letters I'll be writing. This helps determine where line breaks fall. Sometimes I edit the text further so the line breaks fall in good places and the recipient's name doesn't break across a line. The printout is attached to my drawing board (upper-left of the picture).
2. Practice the hand
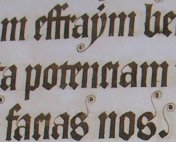
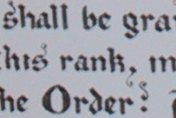
I practice the hand I'm going to use. In this case it was similar to Gothic, taken directly from the pages of the Luttrell Psalter. I write each letter several times to get used to it, and attach the practice sheet to my drawing board. While similar to the Gothic in Drogin, this variation has interesting flourishes — including the 's' and the punctuation. The original is shown on top, the scroll on the bottom; the original is more condensed but the hands and flourishes match.
For calligraphy, I use a dip pen — literally dipping it into the ink — and a clean sheet of paper under my hand to avoid getting grease on the scroll. I refill every line or so and take stretching breaks every fifth line. Keeping your writing hand relaxed is important. This particular scroll took about an hour to write.
3. Capitals and filigree
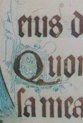
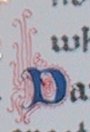
Add details to the capitals. Important capitals — the recipient's name, the Baron's name — are painted in blue over the black ink. In the Luttrell Psalter, capitals are drawn using Versal letters surrounded by fine line work. This filigree was done with a crow-quill pen, which has a very sharp tip, dipped in diluted red gouache. The original (in blue) is on the left, the scroll (in red) on the right.
4. Pencil layout
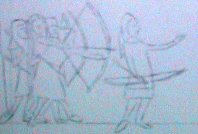
After finishing the calligraphy and capitals, the design for the illumination is drawn in pencil. For miniatures — like the archers at the bottom — a tracing of the original is made and transferred to the scroll. This was also done with the bear at the top, using a picture from The Hunting Book by Gaston Phoebus. A bear climbing a tree was chosen, reduced in size, and the hind leg modified so the bear looks like it's hanging from a branch rather than climbing.
5. Gold leaf
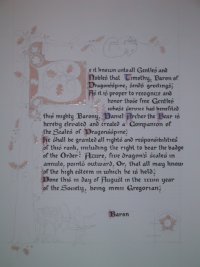
Apply gold leaf before any other illumination — gold leaf will stick to gouache. (The fine filigree is too small for the gold to stick to, so that step is flexible.) Areas are painted with gesso or "size." For Colorado's low humidity I use Mistress Tatiana's special acrylic size. After letting it dry for several hours, blow on it through a straw to moisten the surface, then lay a sheet of gold leaf over it and burnish — the gold sticks to the moistened size.
On this scroll the initial 'B', about half the oak leaves, all the acorns, and the dragon scales in the badge of the order are covered in gold.
6. Painting begins
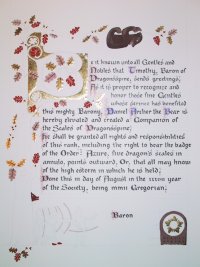
Schmincke calligraphy gouache is used. A scrap paper tests the colors as they're mixed to closely match the original — and helps get the consistency just right. You want it thick enough to be opaque but thin enough to flow nicely. The pencil design guides the brush, but the brush is allowed to flow and turn to create nice shapes. Thicker white gouache paints the veins of the leaves; thick brown gouache paints veins on the gold leaves. I mix one color and paint everything that uses it, then lighten or darken to highlight details.
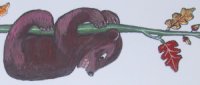
7. Bear shading
The bear has many different shades of brown to give it a three-dimensional shape. This shows the completed bear after all shading and white work.
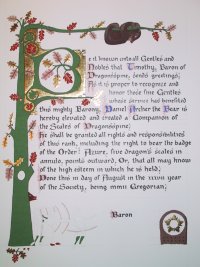
8. Greens
Greens applied. Getting the consistency of the green gouache just right to cover large areas — like the trunk of the tree — takes some experimenting. Green was chosen for the tree instead of the original blue because the recipient's colors are green and gold.
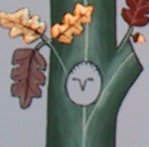
9. White work
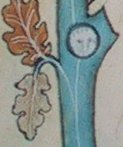
After all the solid colors are applied, the white work is done — shading the illumination using diluted white gouache, then adding fine white lines to the details. A diluted wash is used in the middle of the trunk; once dry, a fine white line is drawn down the center to match the original (bottom, blue instead of green).
10. Archers
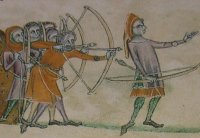
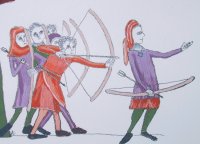
The archers along the bottom are painted next. The colors of the scroll (bottom) look redder due to camera flash; in person they're much closer to the original (top). Fine line work is done with a crow-quill pen dipped in black ink — these lines really help finish the work, adding expressions to the faces, hands, and bows. More white work brings out details in the clothing; a bit of diluted gray is added to hair, faces, and shadows.
11. Badge and maker's mark
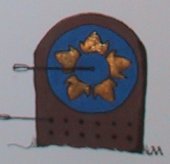
I like adding the badge of the award somewhere on the scroll. Here I added it as part of the archery scene — it makes a great bullseye. There's also a tiny badge around the neck of the rightmost archer.
I always add my maker's mark. On this scroll there are two: the "M" next to the grass on the right side of the archery target's base, and my device, a silver owl, peering out of the tree trunk as in the original.
12. Diaper pattern
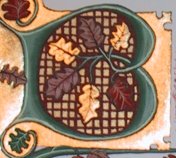
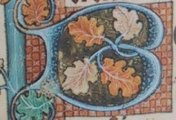
The diapering is added to the background of the initial capital. A simple grid of gold squares was selected for the pattern — similar to many examples in the Luttrell Psalter, including the diaper work outside the capital B from the original (bottom). The entire area is first painted with gold ink (Windsor & Newton), then a series of red lines are painted over the gold horizontally and vertically to create the grid. Leaves are outlined in red and traced using a crow-quill dipped in black ink. Note also the white work in the green areas of the capital, although not as detailed as in the original.


13. Line fillers
Line fillers are added to fill any white space at the end of each paragraph of text. Fillers used in the Luttrell Psalter were chosen — original on top, scroll on the bottom. Detailed white work was again used to highlight the filler.
14. The final scroll
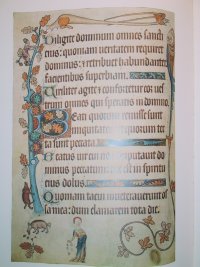
The page from the Luttrell Psalter that inspired the overall design is shown on the bottom. Total time: about 20 hours over several days.
15. The best part
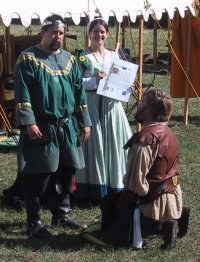
One final step — the best part, that makes all of the detailed work worth it: awarding the scroll to the recipient. This is afternoon court at Baron's War, with Baron Timothy congratulating Daniel Archer the Bear for his great service. The scroll is being held and read by the herald, Mistress Tatiana.
I always like to personalize my scrolls to the recipient (like the bears and archers in this one). The look on their face when they receive the scroll is priceless. I hope this description of my work will help inspire you to go create scrolls yourself, and help raise the level of art on all scrolls in the Society.
— Marko Evanovich Panfilov, 7 August A.S. 37 (2002)